GlobalMailJob Guide
Intro
This guide will help you set up and run a Mailagent. I use Malik Supply as an example with images for illustration.
The guide is written based off a video guide by Kristian Vesterskov. Which you can watch here.
Placeholders
The document has the following placeholders:
- {customer_database_name} - Can be found in the SQL. This example uses mTIME_MALIK_PROD as the {customer_database_name}
- {customer_email} - This is given by a consultant, if it’s not already known. Contact a consultant.
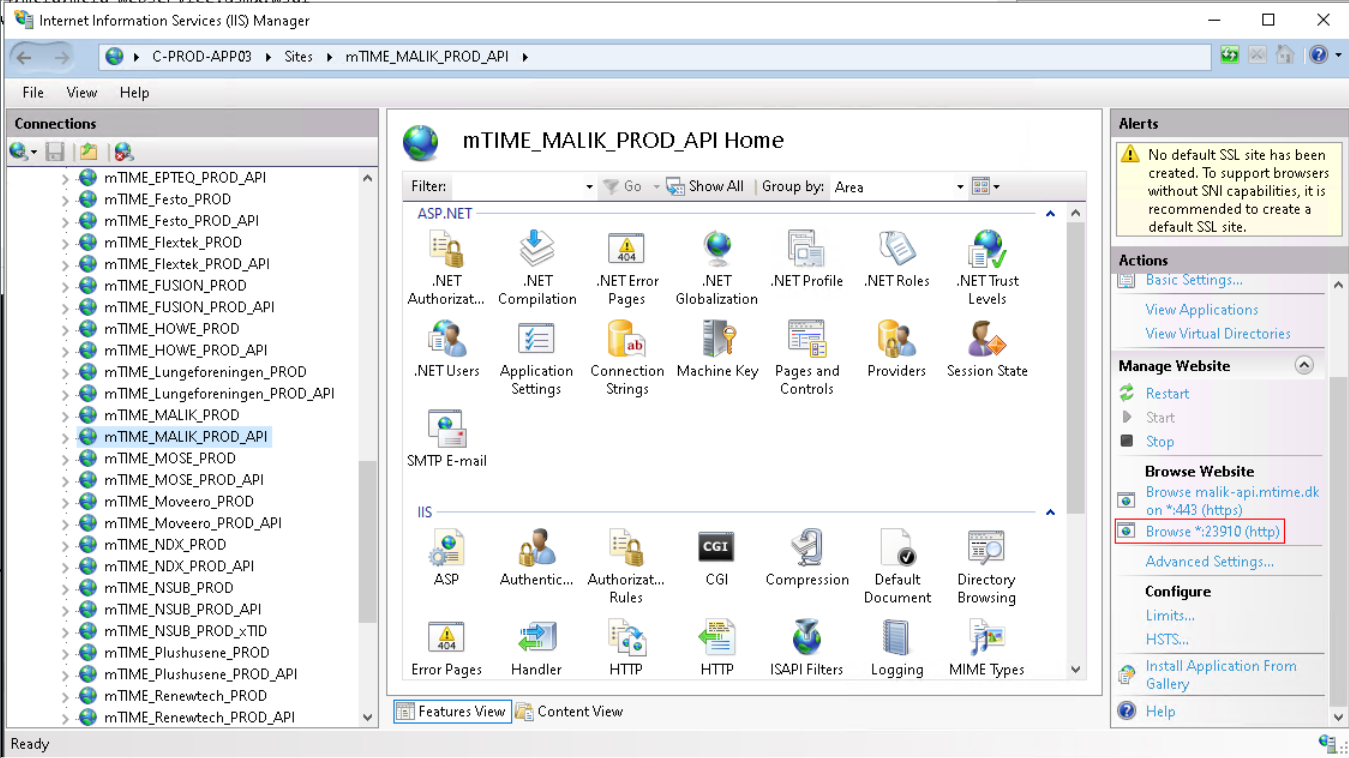
- {mTIME_CUSTOMER_PROD_API port} - Check Image 3 for where to find the API port.
Remember to replace these! Or else none of it will work!
Step 1: .CMD/.cfg configuration
Mailagent configuration is done on the same server number as the C-PROD-SQL number.
So for this example with Malik Supply, are installed on C-PROD-SQL03, therefore mailagent configuration is setup in C-PROD-APP03.
- Remote to the needed C-PROD-APP server
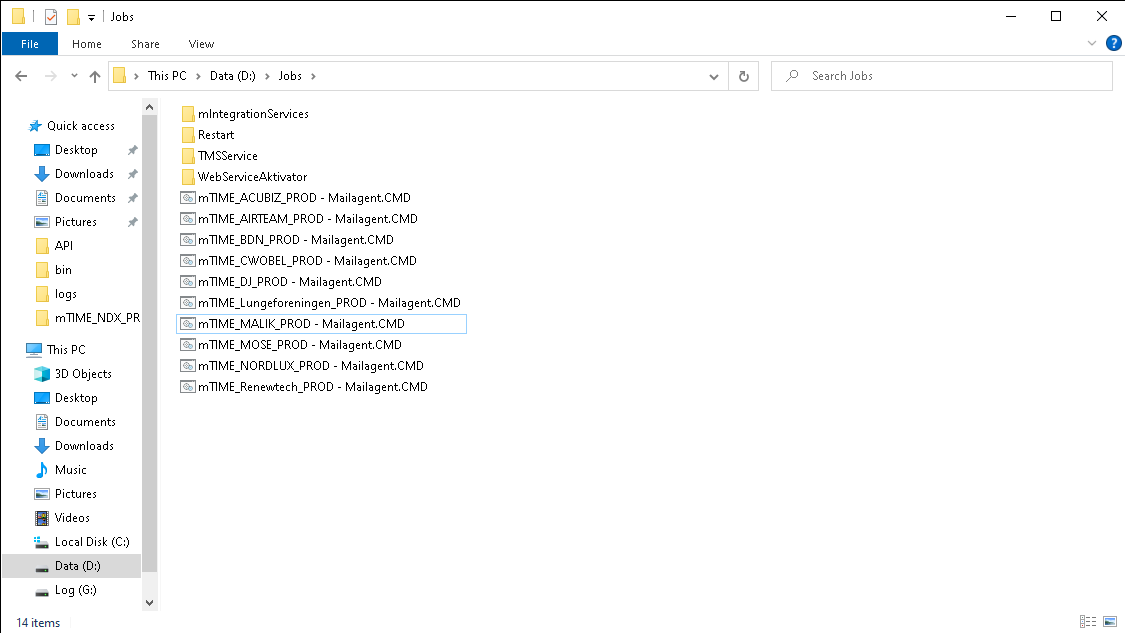
- Open D:\Jobs in file explorer
- Create a new file, with the name mTIME_{customer_database_name}_PROD.CMD - Replace
- Edit the new file and insert the follow text - Replace the {} and it’s contents with the actual customer database name.
| cd “D:\JOBS\WebServiceAktivator” echo fravaersagent for {customer_database_name} .\bin\WebServiceAktivator.exe -f .\bin{customer_database_name}.cfg mTIME_{customer_database_name}_PROD_MAILAGENT 999000000 |
|---|
- Open D:\Jobs\WebServiceAktivator\bin in file explorer
- Create a new file, with the name {customer_database_name}.cfg - Replace the {} and it’s contents with the actual customer database name.
- Edit the new file and insert the follow text - Replace the {} with the required text. See Image 3 for API port example.
| [mTIME_{customer_database_name}_PROD_MAILAGENT] http://localhost:{mTIME_CUSTOMER_PROD_API port}/mtid/mtid_webservice.asmx?wsdl mTID_WebService.MailAgent_Run() |
|---|


| cd “D:\JOBS\WebServiceAktivator” echo fravaersagent for MALIK .\bin\WebServiceAktivator.exe -f .\bin\MALIK.cfg mTIME_MALIK_PROD_MAILAGENT 999000000 |
|---|
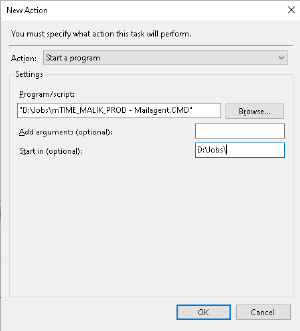
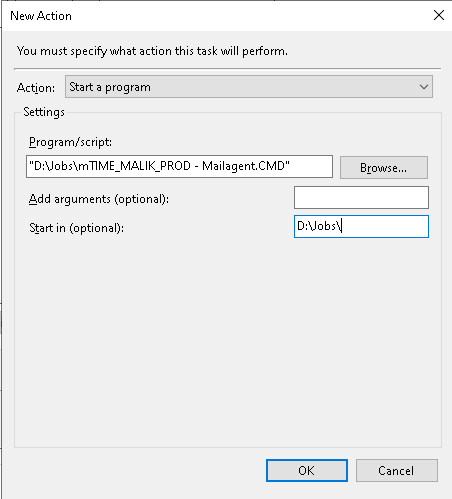
| Image 4, mTIME_MALIK_PROD - Mailagent.CMD |
| [mTIME_MALIK_PROD_MAILAGENT] http://localhost:23910/mtid/mtid_webservice.asmx?wsdl mTID_WebService.MailAgent_Run() |
|---|
| Image 5, MALIK.cfg configuration example |
Step 2: Check SQL
Before starting on step 2. Make sure the customer has the Start Gml Mailagent job, if they don’t. Add it, and come back.
- Create a new query on the customer DB
| SELECT * FROM VersionsMuligheder WHERE Navn IN (‘GlobalMail_DefaultSender’, ‘GlobalMail_Host’, ‘JobNameMailAgent’, ‘Kvitteringsadresser’) |
|---|
Check the following values:
| Columns | Value |
|---|---|
| GlobalMail_DefaultSender | noreply@timemsystem.com |
| GlobalMail_Host | in-v3.mailjet.com |
| JobNameMailAgent | mTIME_{customer_database_name}_PROD - Start Gml Mailagent |
| Kvitteringsadresser | This value should be the email given by the customer. If it hasn’t be changed yet, and the value remains “KONSULENT/kunden SÆTTER OP”. Run the command: Update VersionsMuligheder set Vaerdi = ‘{customer_email}’ where navn = ‘Kvitteringsadresser’ |
Step 2: Task Scheduler
Open task scheduler and create a task
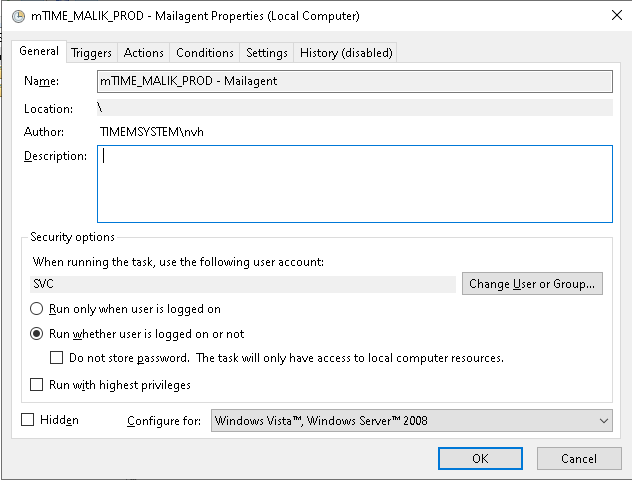
General:
Change name to “mTIME_{customer_database_name}_PROD - Mailagent”
Change user to TIMEMSYSTEM\SVC
Change to “Run whether user is logged on or not”
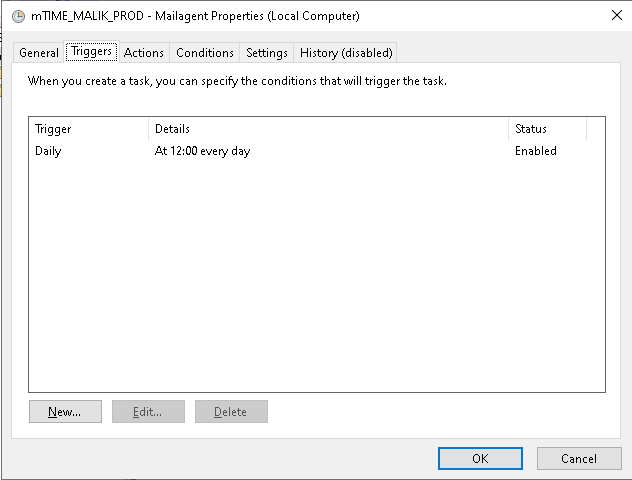
Triggers:
Set task to run ‘Daily’, and set the time to be off-hours.
Actions:
Set action to start the .CMD
Run the job
Check logs under D:\Jobs\WebServiceAktivator\logs


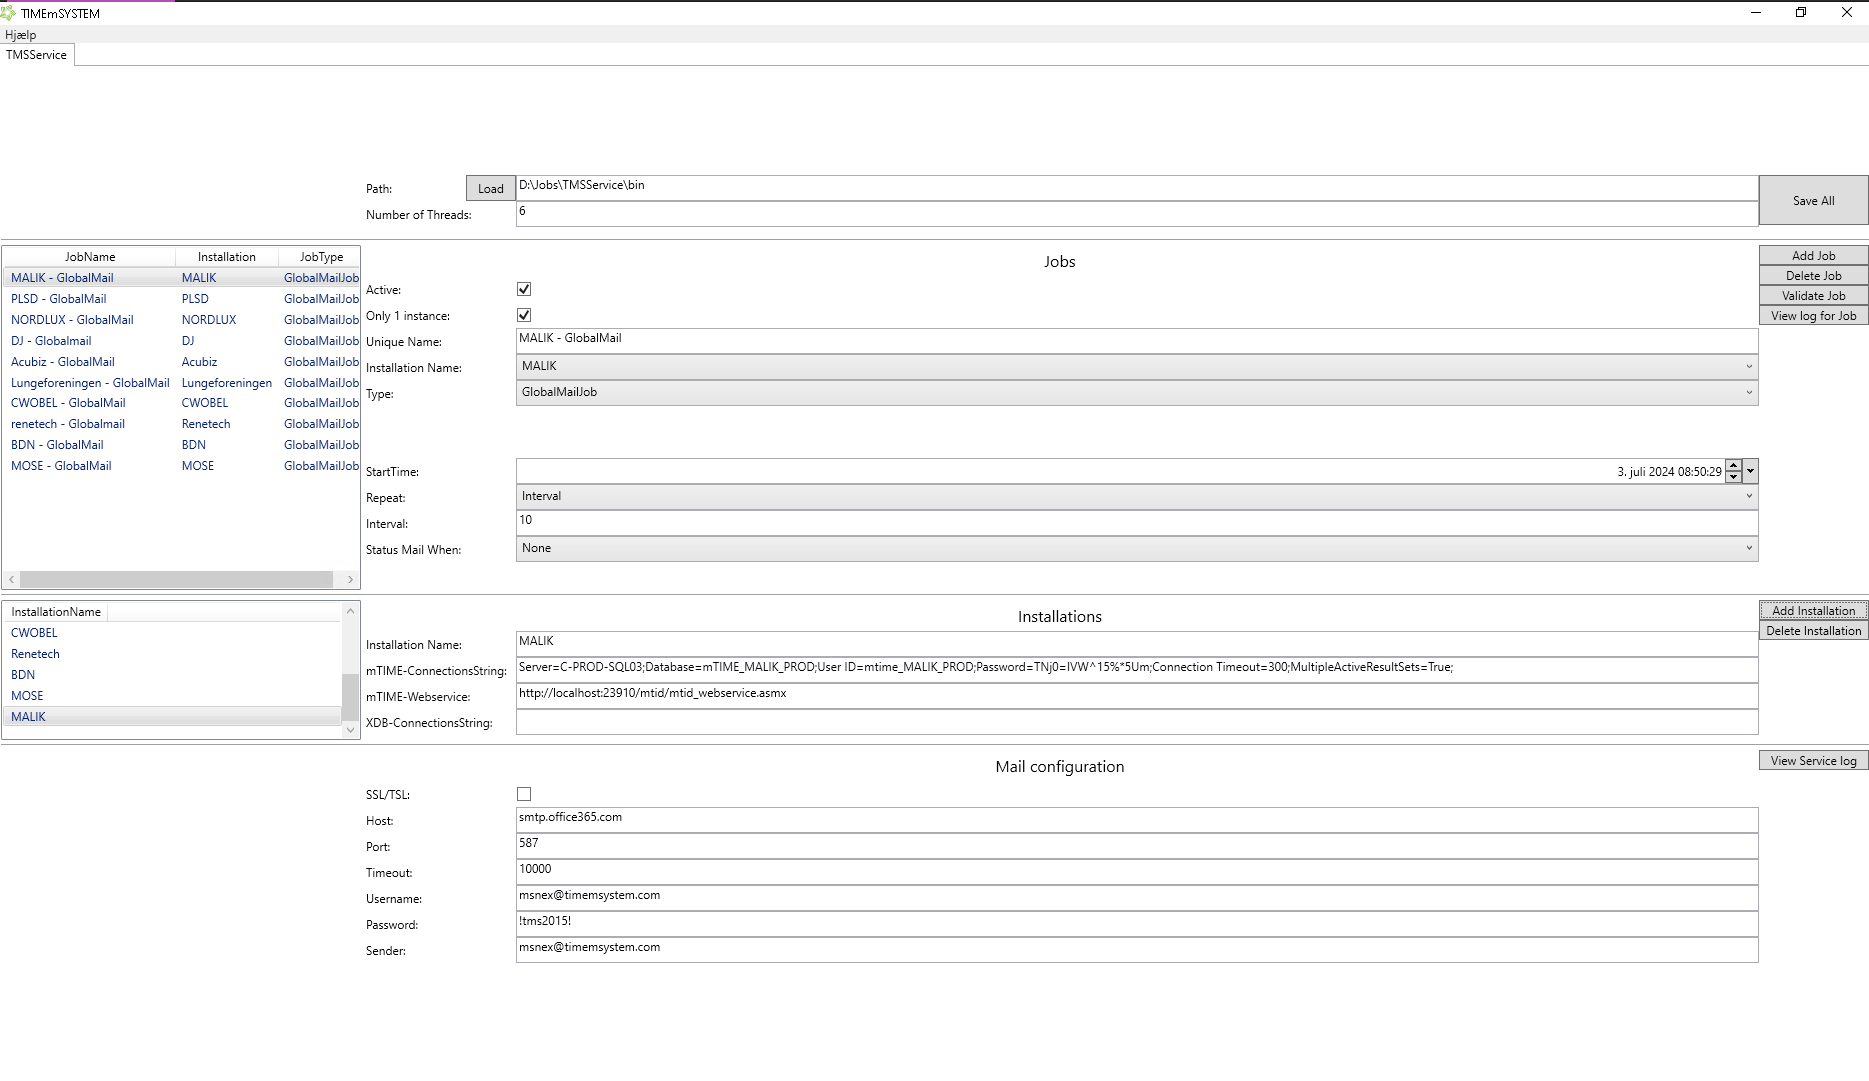
Step 3: TMSService
Open D:\Jobs\TMSService\bin\TMSServiceWPF.exe
Click ‘Add Installation’, and fill in the customer name in Job Name
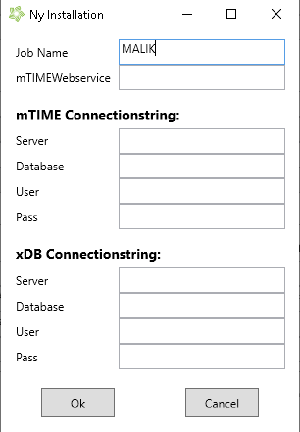
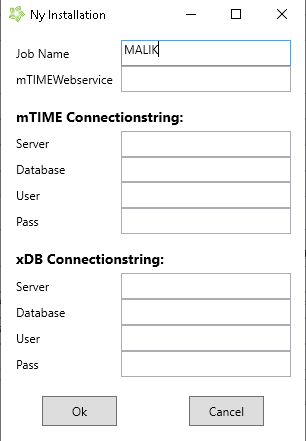
This is the configuration of TMSService for GlobalMail. Change the following values:
- Unique Name : {customer_database_name} - GlobalMail
- Installation Name : Choose MALIK
- Type : GlobalMailJob
- Repeat : Interval
- Interval : 10
- Status Mail When : None
- Installation Name : {customer_database_name}
- mTIME-ConnectionsString : This can be either copied over from another another installation, if done so. Do remember to change the neccessary values such as naming and password. Or go to D:\Websites\mTIME_{customer_database_name}_PROD_API\Web_Local_ConnectionString.config and copy the connection string.


Step 3.1: Testing TMSService
After setting up TMSService GlobalMailJob, you can make sure it works by following these steps:
Change interval to 1 in TMSService.
On the customer DB, run this command
SELECT * FROM GlobalMailCheck ProcessedTime. If it’s NULL, TMSService isn’t setup correctly. It should be giving a datetime.
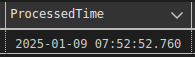

Remember to change Interval to 10 afterwards.
Source: Confluence | Page ID: 594051074